Set Up a Project for a Team
A project is an independent annotation job: one folder of images, its labels and settings, and the people who work on it. This guide sets up a project for a team of annotators with a reviewer. You need the role Admin (server administrator).
1. Put the images in place
Copy the images (PNG, JPEG, BMP or TIFF) into a folder the server can read, or add them later in the browser (Adding Images); the folder can be for example D:\LumiScan\Line7 or a network share mounted on the server. Either the images are directly in that folder, or in one level of sub-folders, typically one per day:
D:\LumiScan\Line7\
    2026-11-02\  image_001.png  image_002.png ...
    2026-11-03\  ...
The annotation files are written next to the images. Folders that already contain annotations from the desktop tool are used as they are.
2. Create the project
-
Click your name at the top right, then Projects.
-
Click New project.
-
Enter a Name and, if you like, a Description.
-
Under Existing folder on the server enter the folder, for example
D:\LumiScan\Line7. Left empty, the server creates an empty project folder; you then add images by importing or copying them in. -
Click Create project.
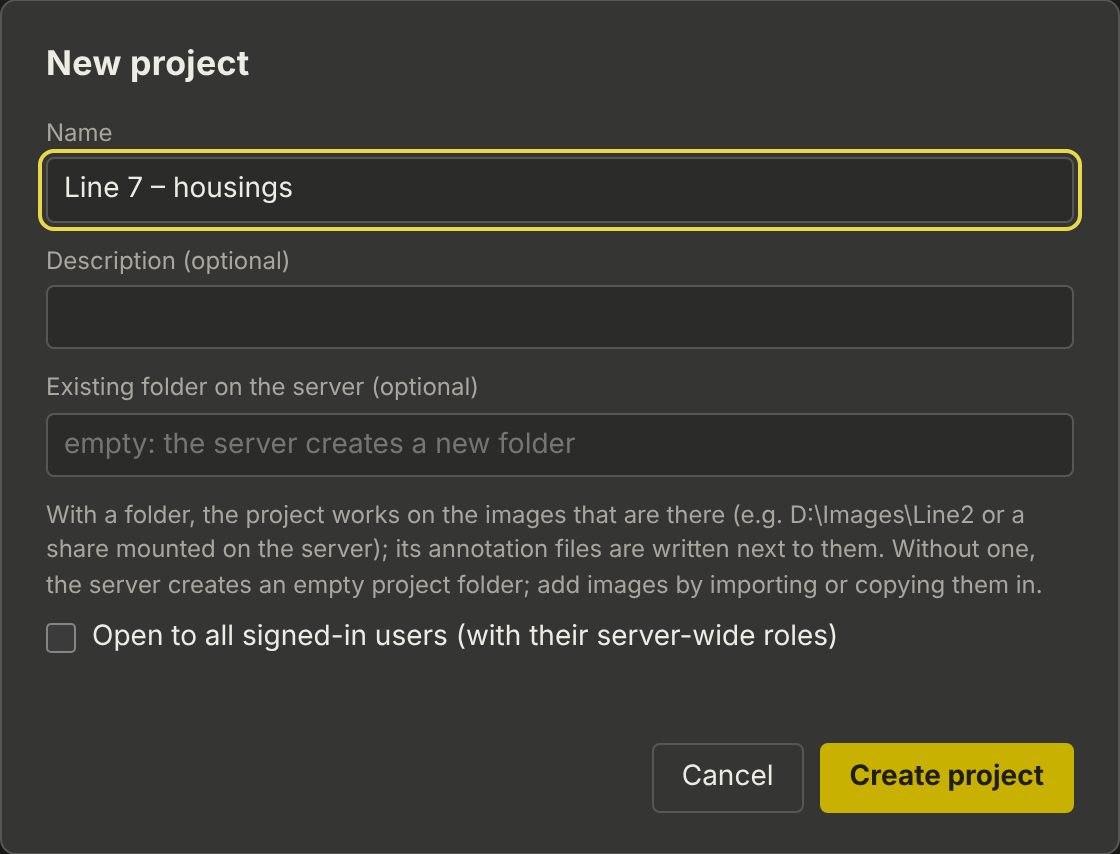
The folders admins may use can be limited in the server configuration (project_folders, see Configuration). With S3 buckets configured, the dialog also offers Store the files in: S3 bucket, see Projects in S3 Buckets.
|
3. Add the members
-
In the project list, click Members & access next to the project.
-
Click Add member for every person or group:
-
User: an account of the server, by its user name.
-
Group: a group of your company directory or single sign-on, for example
Annotation Team. Everyone in the group gets the roles, also people who sign in for the first time later.
-
-
Tick the roles: Annotator draws and saves boxes, Reviewer compares and decides, Project admin manages the members and settings of this project.
-
Click Save.
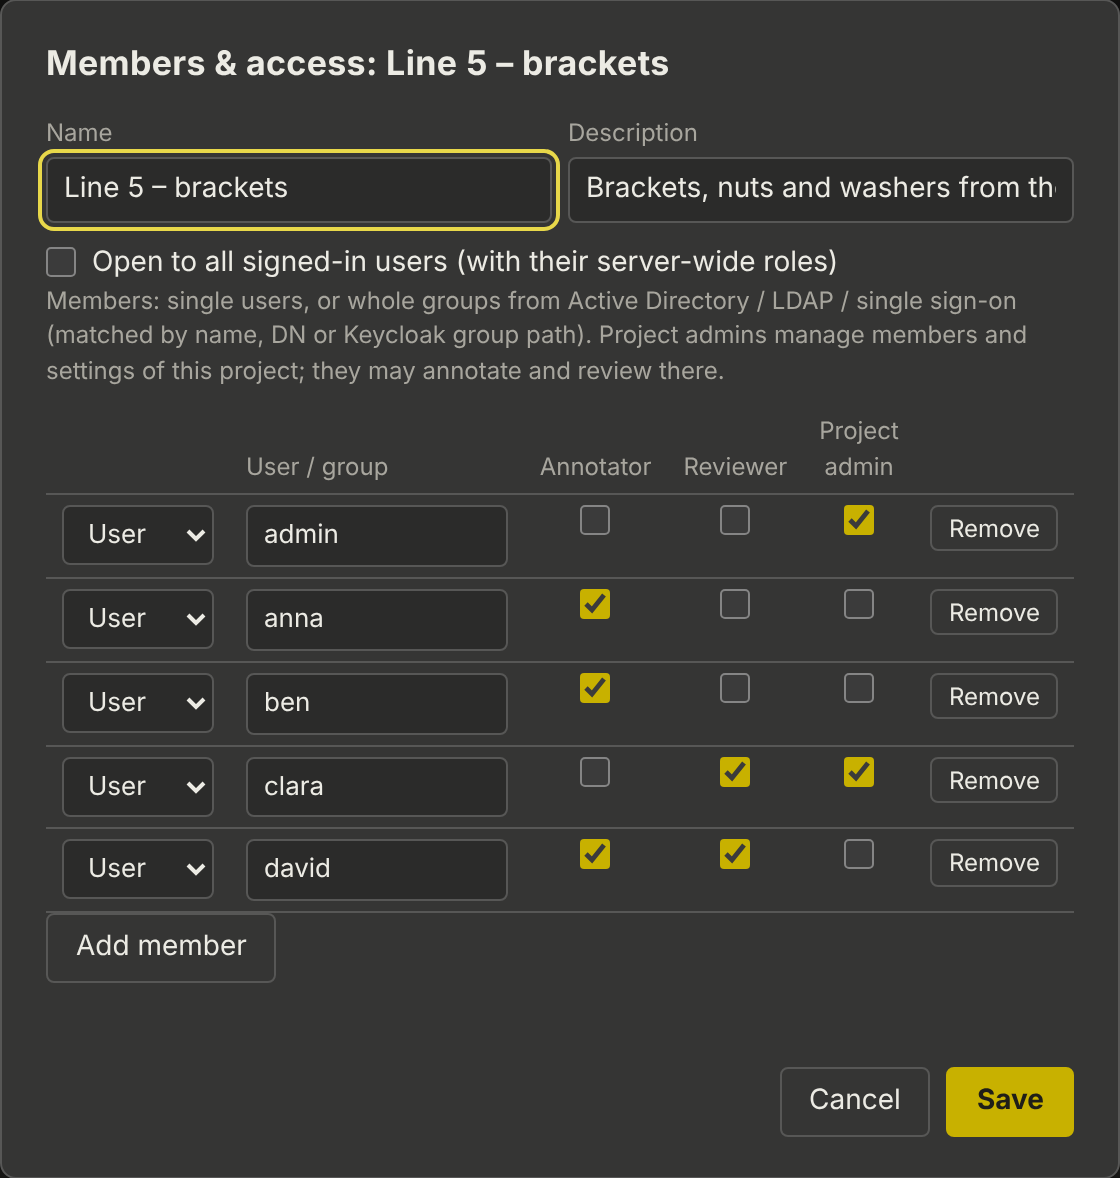
Alternatively, tick Open to all signed-in users: then everyone works in the project with their server-wide roles (see Users and Roles).
4. Set the labels and options
-
Choose the new project in the top bar.
-
Click Settings.
-
Enter the labels, one per line, for example
bracket,nut,washer. The order gives the keys 1 to 9. -
Optional: a region of interest, two or more annotators per image (see Check Annotations with Two Annotators), box suggestions.
-
Click Save settings.
See Project Settings for every option.
5. Tell the team
Send the members the server’s address. They sign in, choose the project in the top bar and start; see Annotate Your First Images.