Adding Images
Project admins add image files from their computer to a project, without access to the server’s folders. + Add images is above the image list.
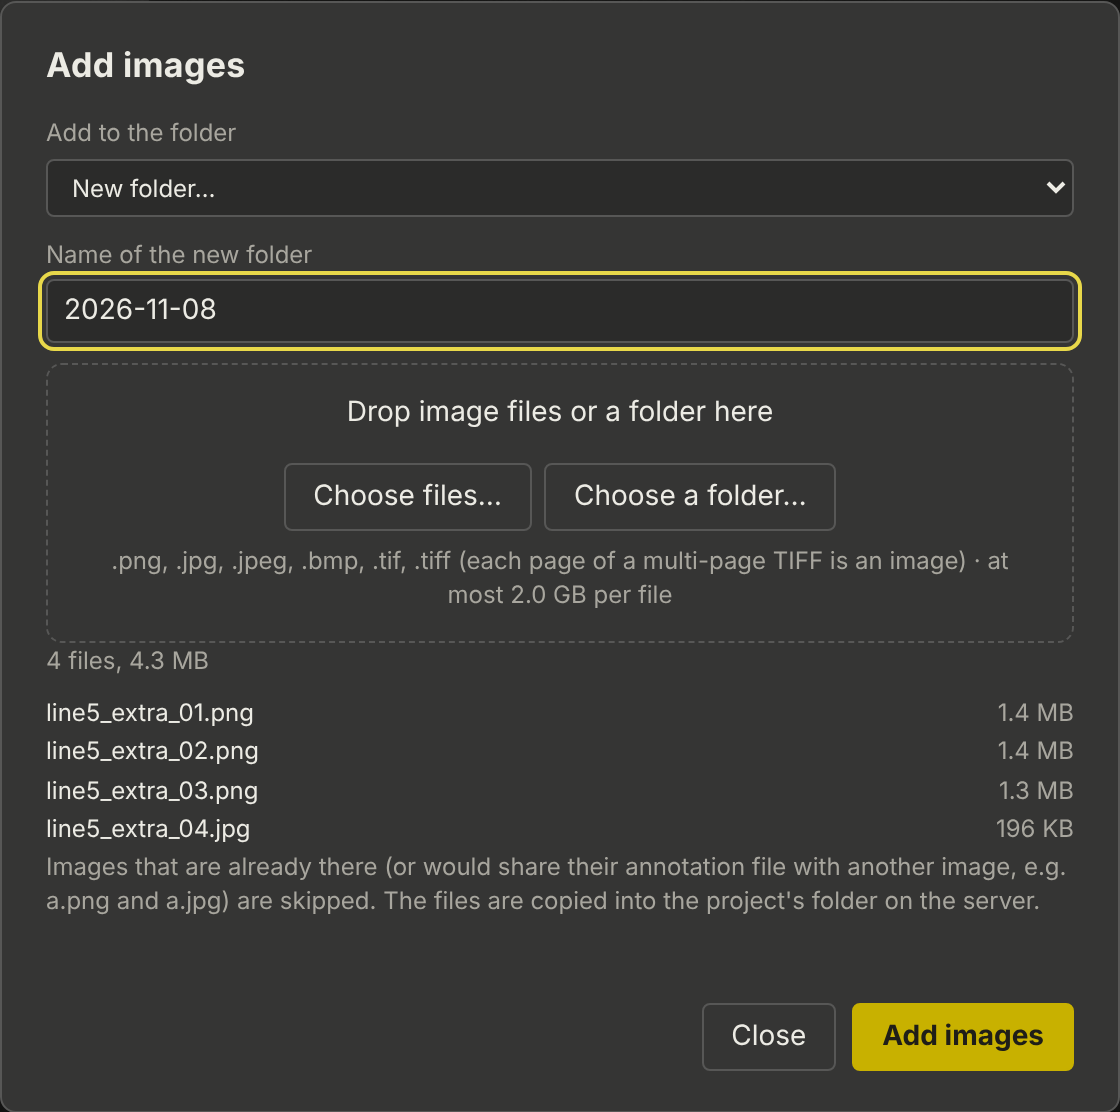
-
Click + Add images.
-
Choose the folder: an existing folder of the project, or New folder… with a name (default: today’s date, for example
2026-11-08). Choosing a folder on your computer suggests its name. -
Choose the images: Choose files…, Choose a folder… (all images in it and its sub-folders), or drag files or a folder onto the dialog.
-
Click Add images. A bar shows the progress. The list then shows the folder with the new images.
Accepted are PNG, JPEG (.jpg, .jpeg), BMP and TIFF (.tif, .tiff, also multi-page), see Image Formats. Other files of a chosen folder are ignored.
What is skipped
-
An image with a name that is already in the folder.
-
An image that would share its annotation file with another one:
part_01.pngandpart_01.jpgboth usepart_01.csv. -
A file whose content does not match its extension (for example a JPEG named
.png).
Skipped images are counted in the message at the end; files that could not be added stay in the dialog with the reason.
Good to know
-
The files are copied into the project’s folder on the server, or into its S3 bucket (Projects in S3 Buckets).
-
A project whose images are directly in its folder (no sub-folders) takes new images there. A sub-folder would hide those images, as in the desktop tool.
-
Large files are sent in pieces of 8 MB. The server accepts files up to 2 GB;
upload_max_mbin the configuration sets another limit. -
Images can also be put into the project folder directly (file explorer, network share, S3 tool): the server finds them within a minute.