Copying Boxes and Templates
Images of a series often show the same parts in nearly the same place. Copying the boxes and moving them a little is much faster than drawing them again.
The Copy ▾ menu below the image collects the ways to copy:
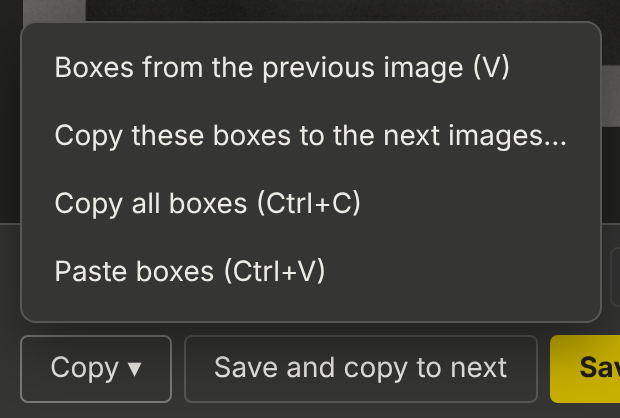
Boxes from the previous image
V (or Copy ▾ → Boxes from the previous image) puts the boxes of the image before this one in the list onto the open image. If the open image has boxes already, you choose: Add them or Replace these.
Then adjust what moved and save. The copy is one step of undo: Ctrl+Z takes it back.
Copy to the next images
For a series where the parts do not move, Copy ▾ → Copy these boxes to the next images… saves the boxes of the open image directly onto the next images of the list:
Number of next images |
How many images after this one, in the order of the list (images the list does not show are skipped). |
Also replace boxes those images have already |
Off (default): images with boxes keep theirs. On: their boxes are replaced. |
Images someone else has open right now are skipped; the status says how many. Open the images afterwards with D and correct what differs.
| Save and copy to next (Alt+S) does the same for one image at a time: it saves, opens the next image and puts the boxes on it, unsaved, so you see each image before it is saved. |
Copy and paste
-
Ctrl+C copies the selected box, or all boxes if none is selected.
-
Ctrl+V pastes them on the open image, at the same position. It works on any image, also in another browser tab of the same browser.
Ctrl+V pastes when no box is selected. With a box selected, Ctrl+V keeps its meaning from the desktop tool (height − 1 pixel); copying a box deselects it, so Ctrl+C, Ctrl+V pastes. On a Mac, Cmd+C and Cmd+V always copy and paste.
Box templates
Parts of a fixed size get boxes of nearly the same size and orientation on every image. A template remembers that size and orientation per label.
-
Draw one box of the label carefully, with the bottom edge on the correct side of the part (see Box orientation).
-
With the box selected, click Save as template in the Selected box panel (project admins). The label list marks labels with a template with ▭.
-
From then on, T places a box of the current label at the mouse pointer: the label of the selected box, or the one clicked last. Place … template in the Labels panel does the same in the middle of the image.
-
Move the box into place (drag, or the arrow keys) and turn it if needed (Ctrl / Shift + U / O).
Templates are part of the project settings, where they can also be changed or removed.