Installation
|
Electric Shock Hazard
Use of unauthorized power supplies may result in electric shock, fire, and/or burns. This could result in damage to the product, serious injury or even death.
|
|
Electric Shock Hazard
Incorrect operating voltage may result in electric shock, fire and/or burns. This could result in damage to the product, serious injury or even death.
|
Mounting the Camera
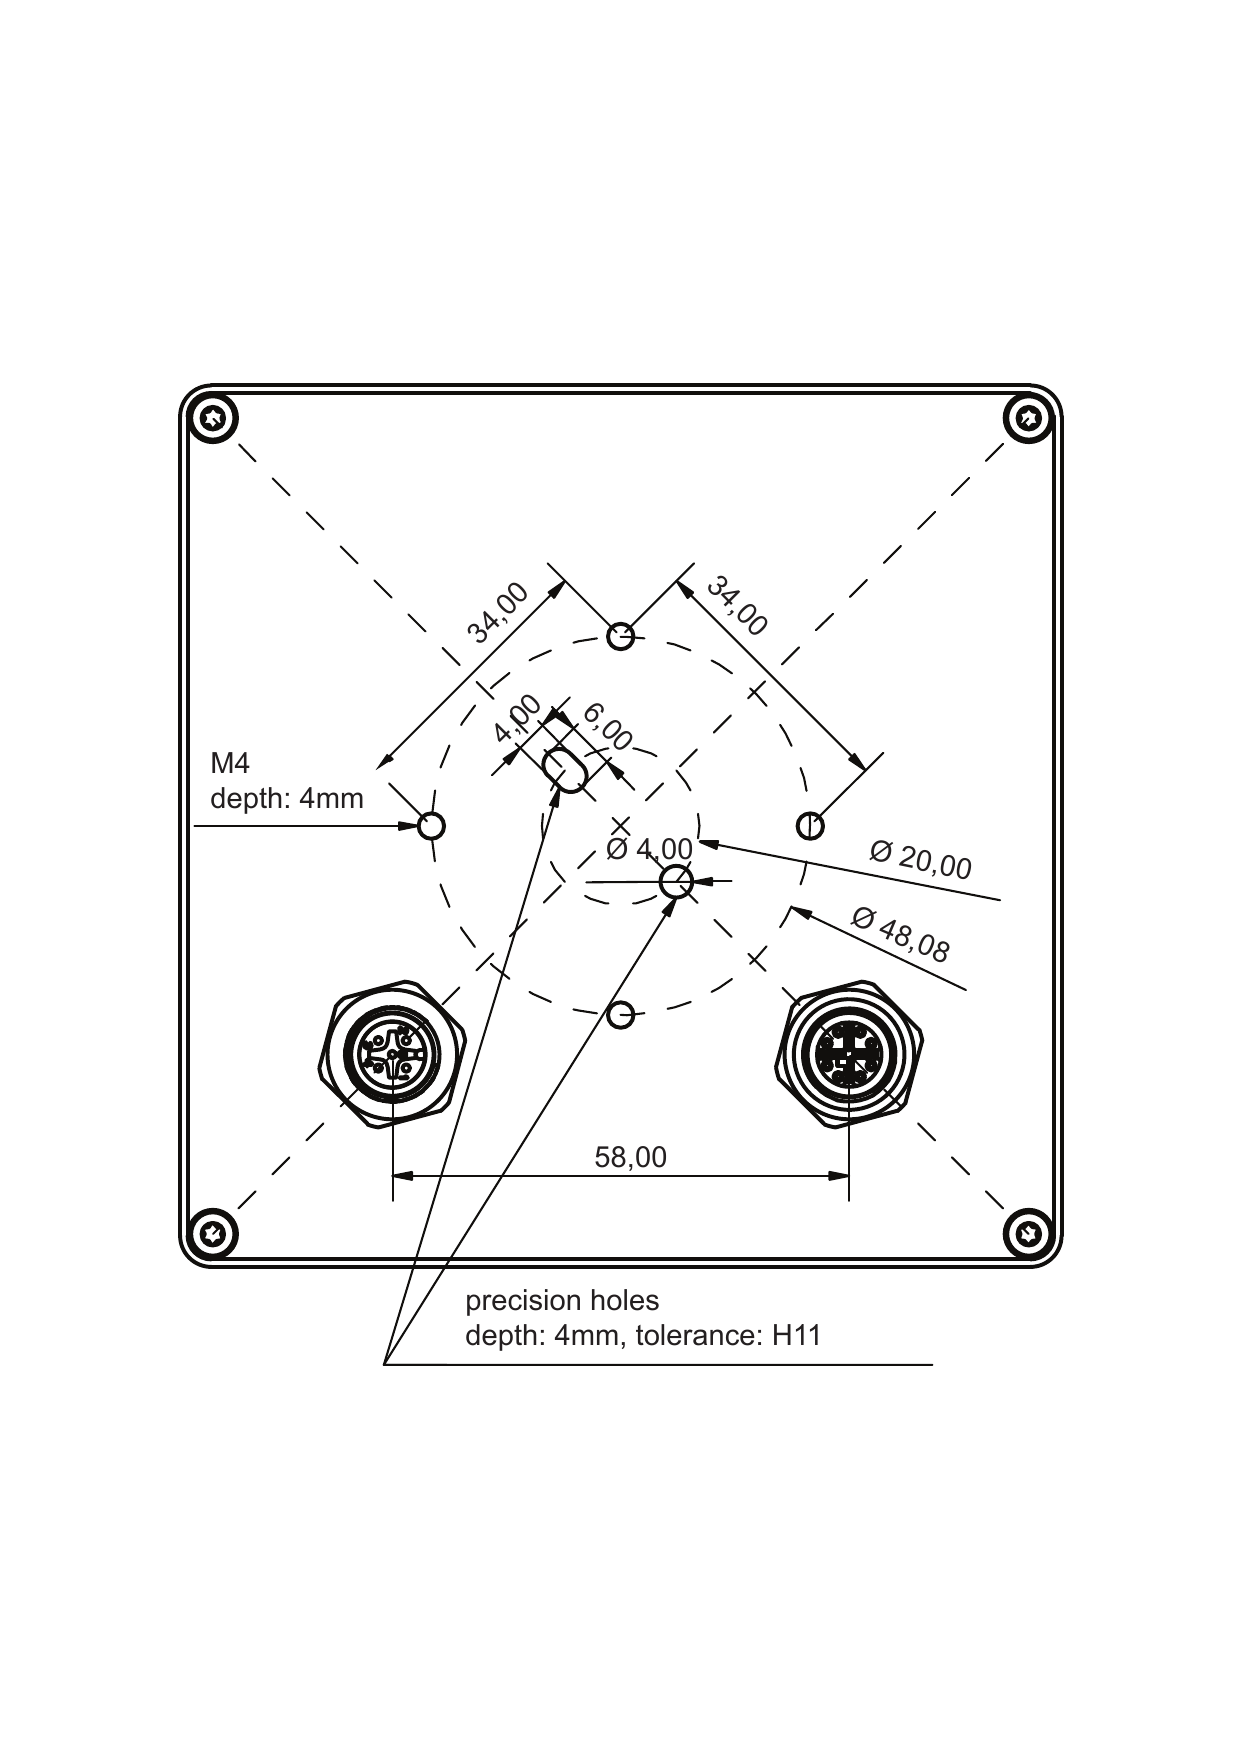
Mount LumiScan X to a suitable fixture using the four rear screw holes (Connectors of the LumiScan X Camera System: Dimensions in mm.).
|
Pay attention to the orientation of the LumiScan X during installation. The camera should be oriented so that a cross (+) and not an x is visible on the front screen (LumiScan X camera orientation.). The housing is then rotated by 45°: the arms of the cross are vertical and horizontal, and the logo is at about 10 o’clock. |

Connecting the Camera System
|
Do not use pliers or similar tools to twist the plug. This may damage the product. |
If you are using an AC adapter for power supply:
-
Screw the M12 plug of the Ethernet cable into the corresponding 8-pin socket on the back of the camera.
-
Carefully tighten the plug (maximum hand-tight).
-
Connect the RJ-45 plug of the Ethernet cable to the Ethernet port on your computer.
-
Screw the M12 connector of the sensor/actuator cable to the 5-pin connector on the back of the camera.
-
Carefully tighten the plug (maximum hand-tight).
-
Connect the 24 V power supply to the sensor/actuator cable (for pin assignment, see Pin Assignment IO-Link).
If you are using Power over Ethernet (PoE) with a PoE-enabled computer:
-
Connect the M12 plug of the Ethernet cable to the corresponding 8-pin socket on the back of the camera.
-
Connect the other end of the cable to the PoE-enabled Ethernet port on your computer.
If you use Power over Ethernet (PoE) with a PoE injector:
-
Plug one end of an Ethernet cable into the In port on the Power Injector.
-
Plug the other end of the cable into the Ethernet port on your computer.
-
Connect the RJ45 connector of the Ethernet cable to the Out port of the PoE injector.
-
Connect the M12 plug of the cable to the corresponding 8-pin socket on the back of the camera (Connectors of the LumiScan X Camera System: Dimensions in mm.).
-
Connect the injector to an electrical outlet using the power cord.
The camera starts up as soon as the power supply is connected and is ready to use in about 30 seconds.
Network Settings
-
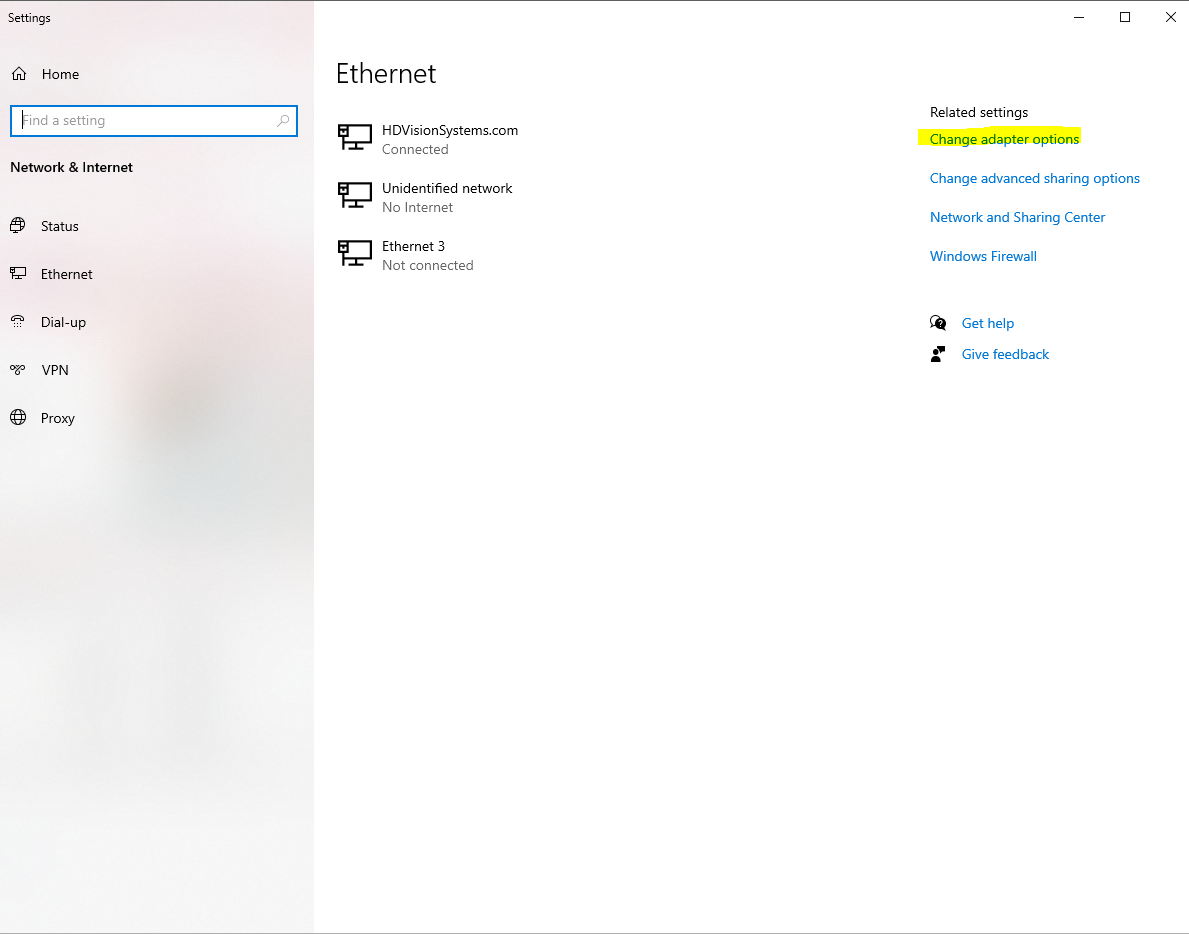
Open the Ethernet settings and select Change adapter options (Ethernet settings).
-
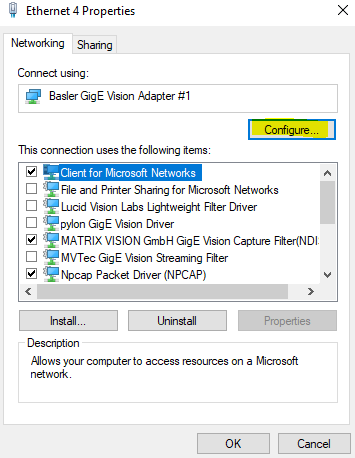
Open the settings for the Ethernet port to which the LumiScan X is connected.
-
On the Networking tab, select Configure (Ethernet settings: Networking).
-
Switch to the Advanced tab.
-
Select Maximum (9014 bytes) for jumbo frames.
-
Set:
-
Receive Buffers to 2048
-
Transmit Buffers to 2048
-
-
If these settings are not possible, update the driver.
Windows Firewall
The LumiScan software should be added to the inbound rules of the Windows firewall. Either once for TCP/UDP together or separately via two entries. With an automatic entry via Windows, two rules are created by default.
When the LumiScan software is started for the first time, Windows Defender automatically asks if the software should be allowed to access the network.
Confirm the access permission for the LumiScan software.
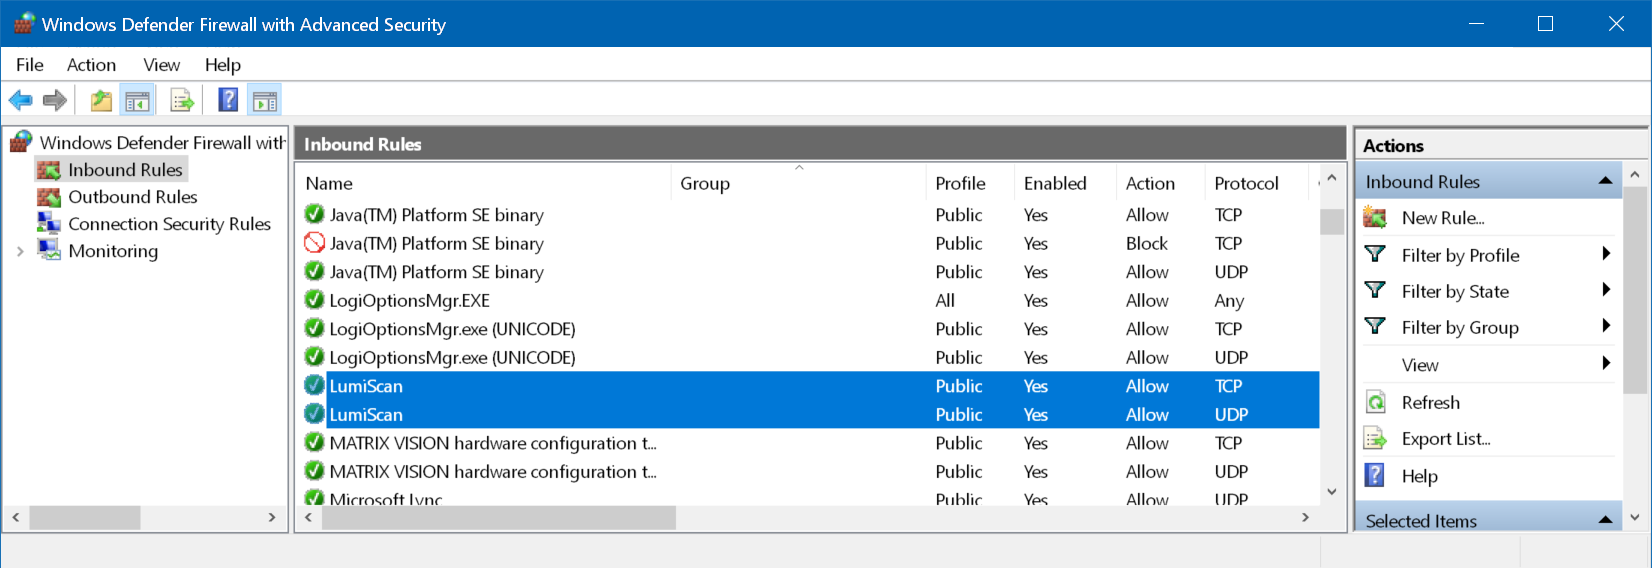
If access is denied or the prompt does not appear at the first start, the camera cannot be found by the LumiScan software. The user will be informed by a message from the software.
One way to resolve this is to restart the software so that Windows asks for permission again. Alternatively, or if the automatic Windows prompt fails, firewall settings can be made manually.
See also The LumiScan software does not find the camera after the first start.
Manual Access to the Network
A program can be manually granted network access rights by adding it to the list of allowed applications in the Windows Defender firewall settings.
To do this:
-
To do this, go to Start → Settings → Privacy & security → Windows Security → Open Windows Security.
-
In the Windows Security window, on the left menu bar, click Firewall and Network Protection.
-
Then click Allow application access through firewall.
√ A window opens with the advanced settings for the application permissions.
-
Click on Change settings → Allow other app.
-
Select the
LumiScanViewerfile. It is located in thebinsubfolder of the installation directory. -
No further changes are required.
-
Then click the Add button.
-
Click on the Done button.
√ The new rule is activated.
Virus Protection
|
Please note that your anti-virus software does not use Deep Packet Inspection. This can lead to a considerable drop in performance. It is recommended that you assign a fixed network adapter to the LumiScan X and deactivate Deep Packet Inspection for this adapter. |
Installing CodeMeter Runtime
The LumiScan software is licensed with the LumiScan Key and needs CodeMeter Runtime 9.00 or later. Install CodeMeter Runtime and connect the LumiScan Key as described in Installing CodeMeter Runtime.
Licence
How LumiScan X is licensed depends on where you bought it and where it runs:
| Bought from | Runs on | Licensing |
|---|---|---|
HD Vision Systems |
PC with the LumiScan software |
The licence is held on your LumiScan Key. |
Each device on which LumiScan X runs at the same time needs its own LumiScan Key. Keys can be exchanged between devices.
How to install CodeMeter Runtime and how to request, renew and move licences is described in LumiScan Licensing.
Installation
Installing the LumiScan software on Windows:
-
Close all open applications on your computer.
-
Navigate to the location of the LumiScan installer.
-
Double-click on the file:
Installer_LumiScanX_va_b_c_d.exe*. -
The installation is prepared and the license agreement window opens.
-
Accept the license terms by clicking on Accept.
-
If you want to change the default installation location, click Browse.
-
Navigate to the desired storage location.
-
Press OK to confirm your selection.
-
Otherwise, click the Next button to continue.
-
If desired, select the Start Menu folder for the program links.
-
If you do not want to create shortcuts, select the Do not create links option.
-
Then click on Install.
-
When the installation is complete, you will see a dialog box.
-
Click OK.
-
Click Finish.
For more information about the LumiScan software, refer to the LumiScan Software chapter.
* where a, b, c, d are variables that depend on the version of the software.